Installing SAS4
SAS4 supports two modes of installation, an automated mode using the bootable Ubuntu-based ISO image, and custom mode which is useful when installing on cloud VPS.
1. Hardware Requirements
Before installing the system, make sure your server meets our recommended hardware requirements:
- A well-branded system such as Dell, HP, Lenovo, IBM, Acer….
- High-end CPU with no less than 4 cores.
- 8GB of RAM.
- 250GB of disk space, SSD or SAS15K disks.
- A secondary disk for storing backup files.
- Internet connection (required for license activation).
2. Automated Installation
Before installing the system, make sure your server meets our recommended hardware requirements:
- Download the ISO image from our website: Download ISO and boot your server using it.
- We suggest using a USB bootable drive. To write the image into a bootable USB drive, you can use the ‘dd’ Linux utility:
dd if=/path_to_your_iso_image.iso of=/dev/sdX bs=4M
Where X is your USB drive. - Check your BIOS settings and make sure UEFI boot is disabled. SAS4 supports installing from legacy boot mode only for now.
- Boot your SAS4 DVD/USB, a welcome message will appear, choose “Install SAS RADIUS” to continue.
3. Setup you server
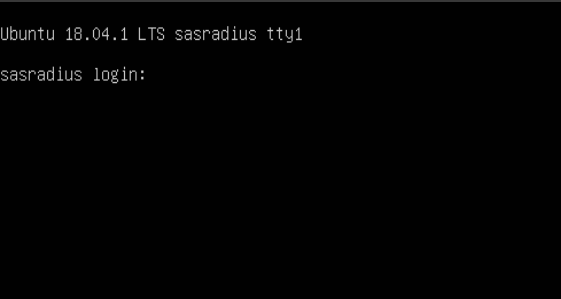
When installation is over,the server will reboot twice. When done , Linux login prompt will appear.Login using username (sas) and password (sas123).
sasradius login: sas
password: sas123
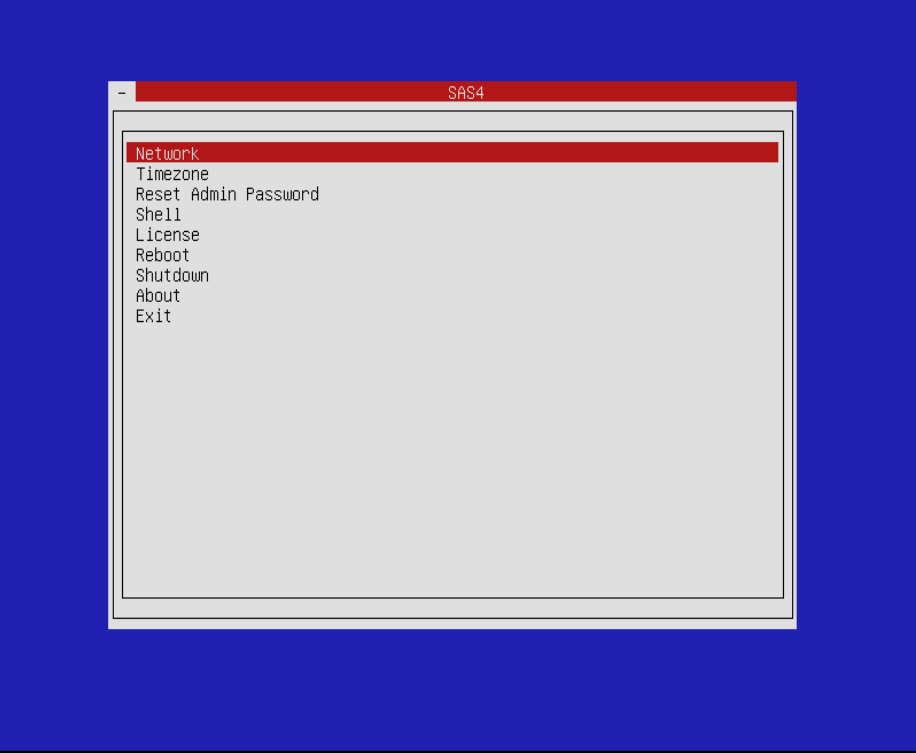
Set your IP address, netmask ,gateway & DNS server (very important), also make sure you set your correct Timezone through system menu.
Next , the server must be connected to the network and internet is reachable, internet is
required to activate the server with the demo license.
From your web browser, login to http://your_ip_address using username & password :
admin/admin
In the dashboard , make sure that snono-systems.com is reachable. SAS3 will try to fetch
the license from our license server. If it fails to reach our license server, SAS3 will become
inactive and will work with limit functionality.

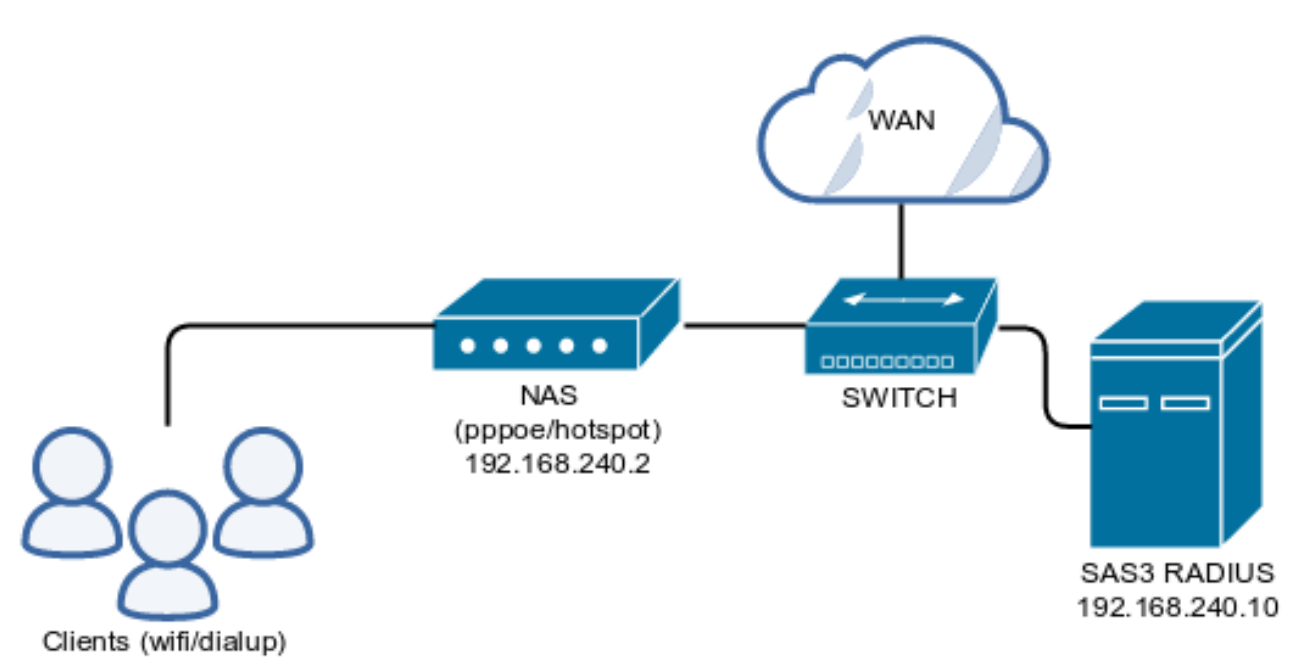
4. Simple NAS Setup With RADIUS Server
In this example , we will assume that you have the following configuration :
- RouterOS NAS : 192.168.240.2.
- SAS3 RADIUS : 192.168.240.10.
- Switch/Hub connecting your WAN,SAS3,NAS all together.
- Users connected to the NAS via PPPoE and/or Hotspot.
5. NAS Configuration Mikrotik
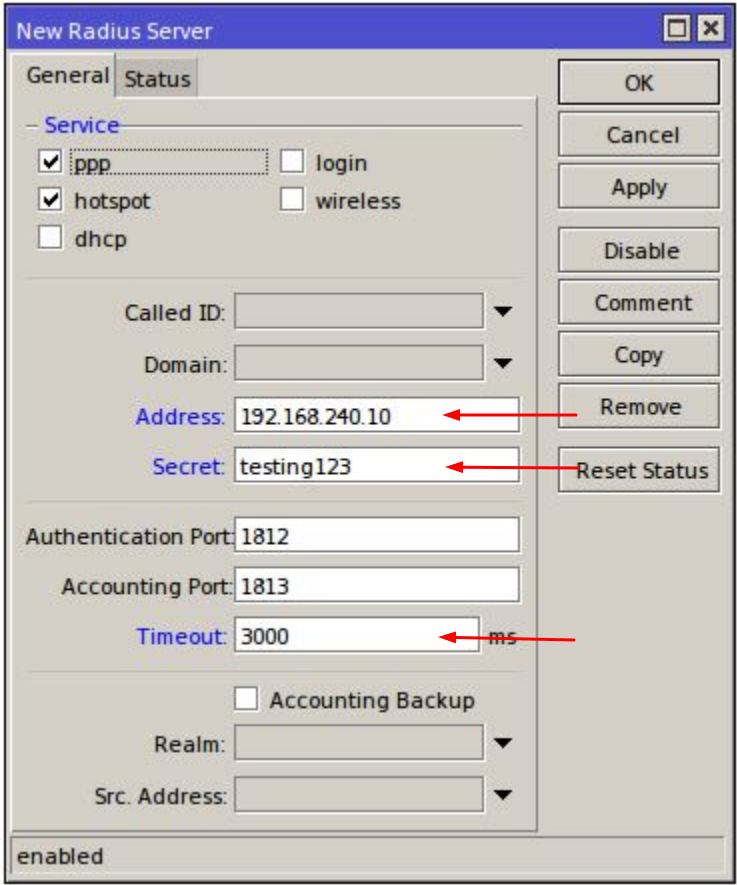
To send authentication and accounting requests to Radius server, You have to configure your Mikrotik NAS. Use Winbox to view and edit the configuration. Follow these steps:
- Connect to your Mikrotik router using Winbox.
- Select Radius from the main menu.
- Click + to define a new RADIUS authentication server.
- In the Address field , add your SAS3 RADIUS IP address.
- Set the Secret to anything you like , remember it as you will need this later.
- Timeout is preferred to be 3000 ms or higher.
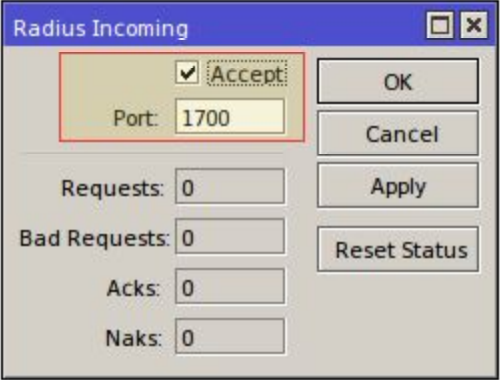
Set RADIUS incoming port to 1700 from RADIUS->Incoming with enable Accept option.
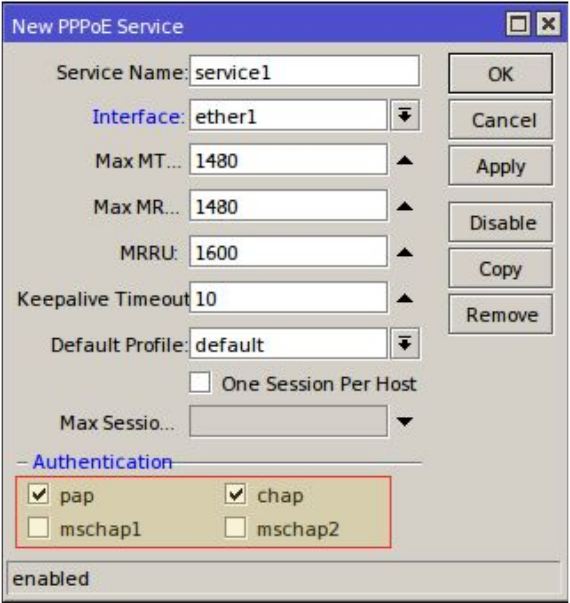
Create new PPPoE service from PPP->PPPoE Servers and click on add (+) make sure that mschap1 & mschap2 both are NOT checked.
Mikrotik is known to have bug in these protocols when enabled with RADIUS server.
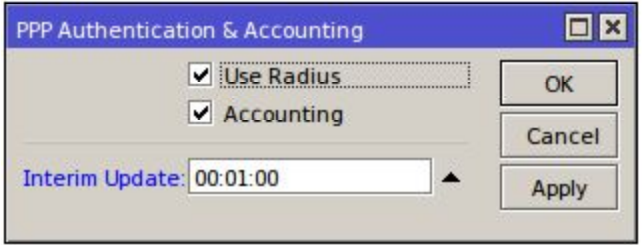
In PPP->Profiles, make sure that you have set proper IP/Pool for the default profile, next enable accounting in PPP->Secrets->Authentication & Accounting.
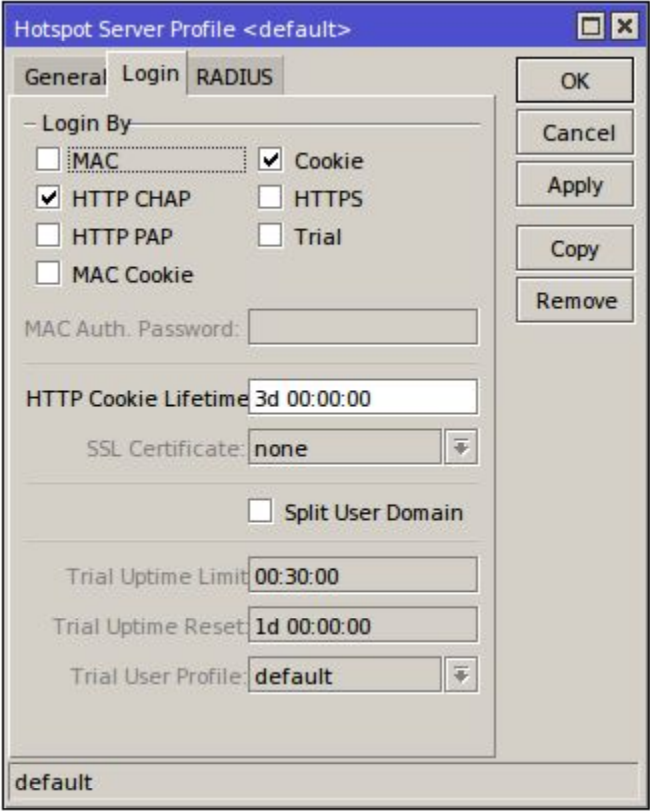
6. NAS Configuration Mikrotik for Hopspot
Assuming you already have functional hotspot setup, go to Hotspot->Server Profiles and select your hotspot profile.
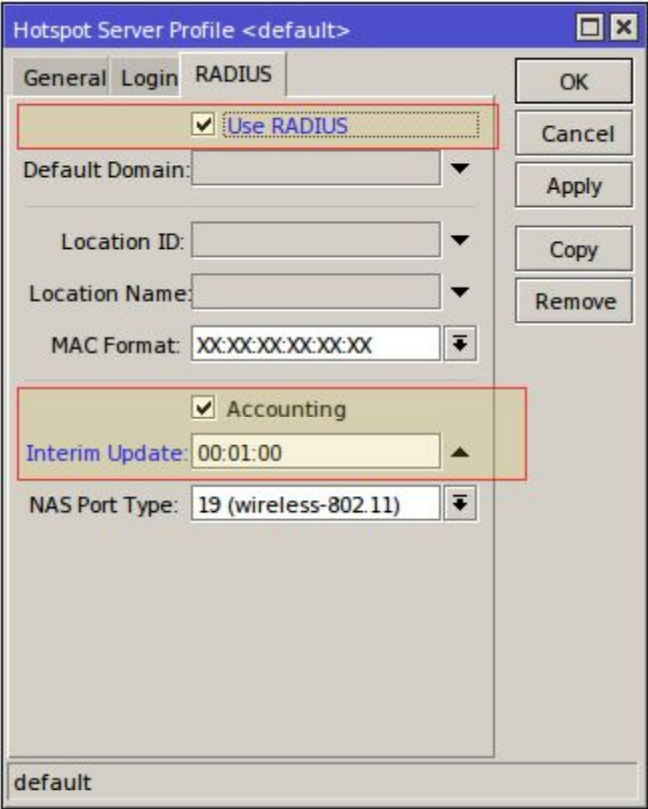
In the ‘Login’ Tab set Login by to ‘HTTP CHAP & Cookie’ as in the picture bellow :
10. Setup new NAS in SAS4
Go to NAS->Actions->Add
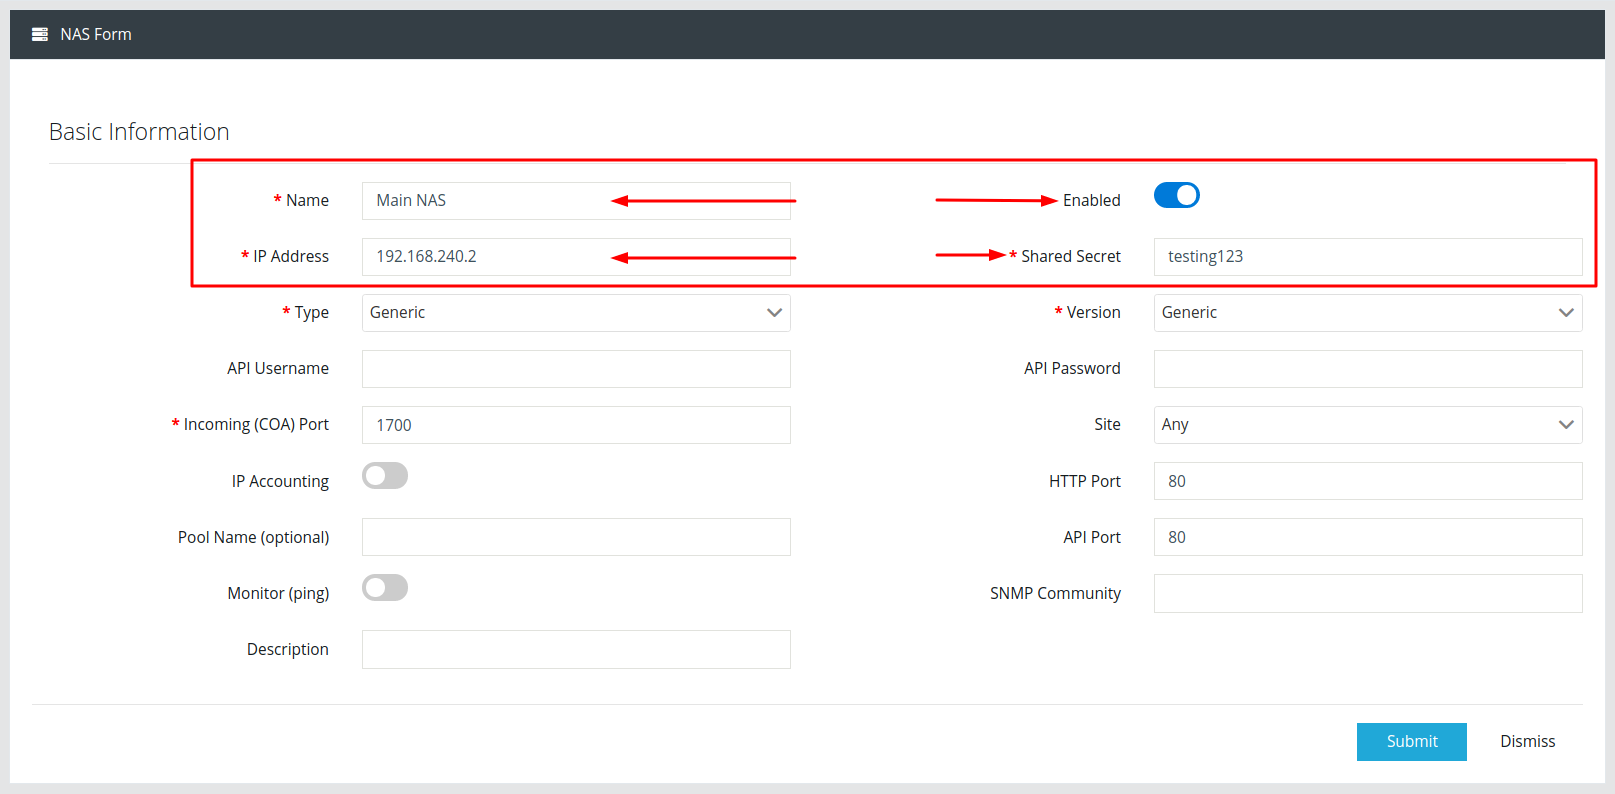
Now you should be ready to add users. If you have problems with users unable to connect, you can always check the RADIUS Log from Reports->RADIUS Log. It will give you a good hint on what is going on.